Repotting a Phalaenopsis Orchid “Keiki”
A Phalaenopsis orchid “keiki” grows on a former blossom stem
Years ago I visited the Philadelphia Flower Show and came home with several different kinds of gorgeous orchids. For months they bloomed and I basked in the glow of success while imagining I was the queen of orchid culture. Guess what. All of them died. All, that is, except my two Phalaenopsis, or Moth Orchids, which are widely regarded as the easiest orchid to grow, and it’s true! In spite of my better efforts to murder these 2 orchids (neglect and several moves), they’ve somehow managed to survive. Well, sort of. You see, last winter one of my Phalaenopsis flowered magnificently. In fact, it was probably the best show I’ve seen yet. Afterwards, I just left the flowering stem be, mostly because I forgot, and also because I wasn’t sure if I wanted to trim it since it kept flowering and flowering. Well, the sad news is the base of that Phalaenopsis withered and died, but at the same time produced a miniature version of itself along the old flowering stem. That little orchid is called a “keiki” and I learned how to repot it today, which I’d like to show you because it’s surprisingly quite simple!

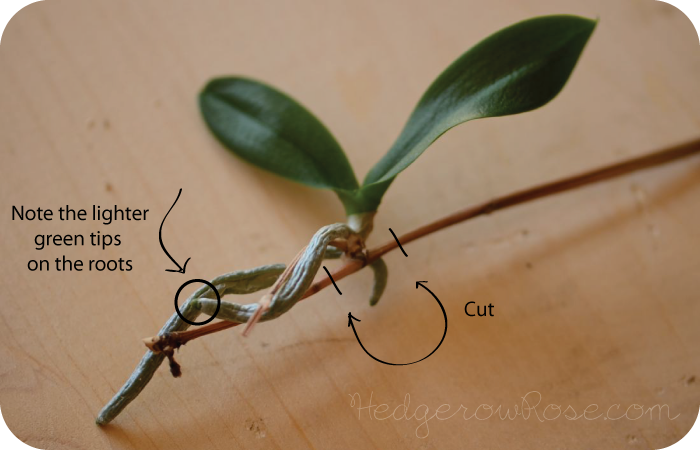
Step 1 is to remove your keiki from the host plant with a sharp pair of sterilized pruners
So, here is my Phalaenopsis keiki. In this photo I’ve removed it from the host plant which was easy because the flowering stem was dried up and just came right out. I made some notes on the photo to show you where to cut the keiki away from the stem. Also, note the green tips of the roots indicating they are healthy and growing. Actually, those roots would probably look a little healthier if I hadn’t let this keiki dry out so much. Yours are going to look even better, OK?

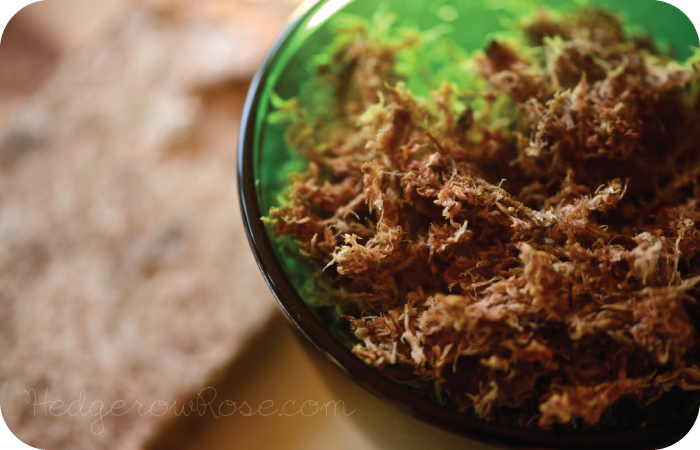
Step 2 is to carefully enclose the delicate roots of your keiki with damp sphagnum moss
This is spaghnum moss which you can use as a medium to repot your Phalaenopsis orchid. I buy this stuff in dried out brick form, so it needed a few minutes to soak (and expand) in water before I used it. I had just enough to repot my keiki and give my other Phalaenopsis a new home. Once the moss is damp (not dripping) and pliable enough to use, take some in your hands and carefully wrap it around the base of your keiki enclosing the roots. Be careful! Don’t press too hard as those roots are very delicate. When that’s done you will carefully push it into a terracotta pot, centering the leaves and keeping them above the sphagnum moss line. Add more moss to the pot as needed to secure the orchid without being too tightly squeezed. That’s it!
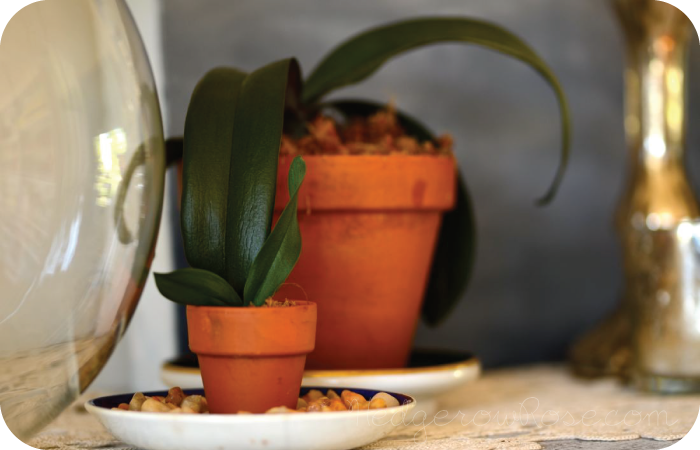
 Step 3 is to carefully insert the keiki into it’s new home, centering the leaves and adding more moss as necessary.
A general rule of thumb for a Phalaenopsis orchid pot size is that it should be about 1/3 to 1/2 the diameter of the leaf spread. Terracotta allows the roots to “breathe” and of course there are special orchid pots that have additional slits in the side to allow air flow. I didn’t have any of those in the size I needed on hand so I went with the standard version of a terracotta pot. Your pot should be clean and sterile, so if you had something growing in it before, make sure to give it a good scrubbing first and rinse any residue off completely. Phalaenopsis orchids prefer daytime temps of 70-80 degrees F and to be allowed to slightly dry out in between waterings.
For more on orchid care, click HERE.
For step-by-step Phalaenopsis repotting instructions, including really helpful pics, click HERE.
PS I just learned something else: My orchids are probably not getting enough sunlight (see how DARK green the leaves are?) Moving them to a brighter location and I’ll have another update in a few weeks or so to see if their health has improved. Determined to keep them alive!


