
Crafting: A decoupaged, “scrappy quilt” gift cone

Are you like me, overrun with piles and piles of scrap fabric from quilting? Then, I have the project for you! It’s short and sweet–just enough time to put on your favorite Christmas movie–and at the end you will have an adorbs container to stash a little gift for someone special.
What you will need:
☆ A papier mâché cone. These are super easy to find in the craft stores right now with the holidays being just around the corner.
☆ Decoupage glue/paintbrush
☆ Craft paint/paintbrush
☆ Decorative paper optional (I used scraps of vintage wallpaper)
☆ Scrap fabric, ribbon, trims, embellishments
☆ Something to punch a small hole. I use the pointy end of scissors but a grommet maker would be even better if you’ve got one.
☆ Hot glue gun
Instructions:
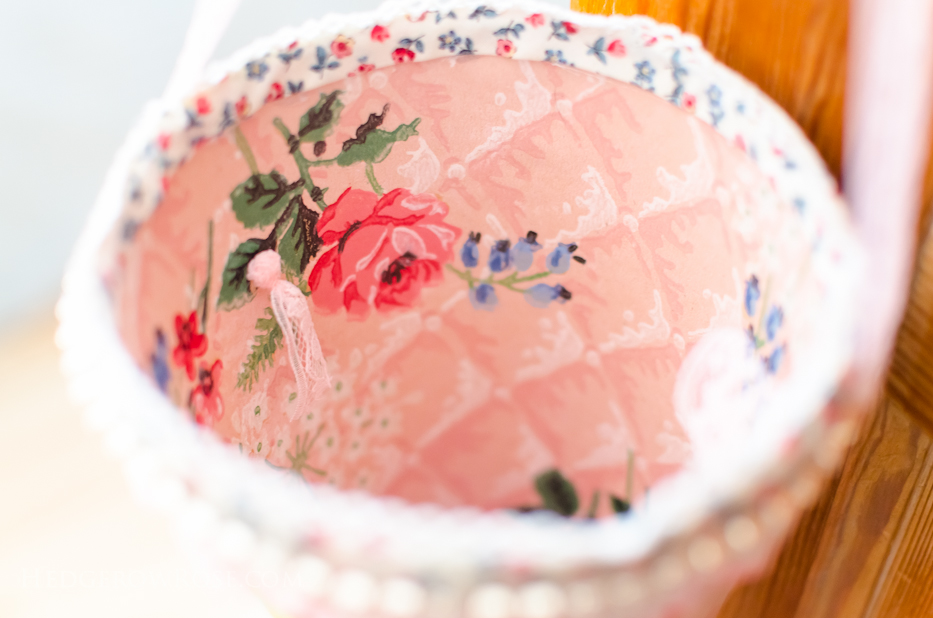
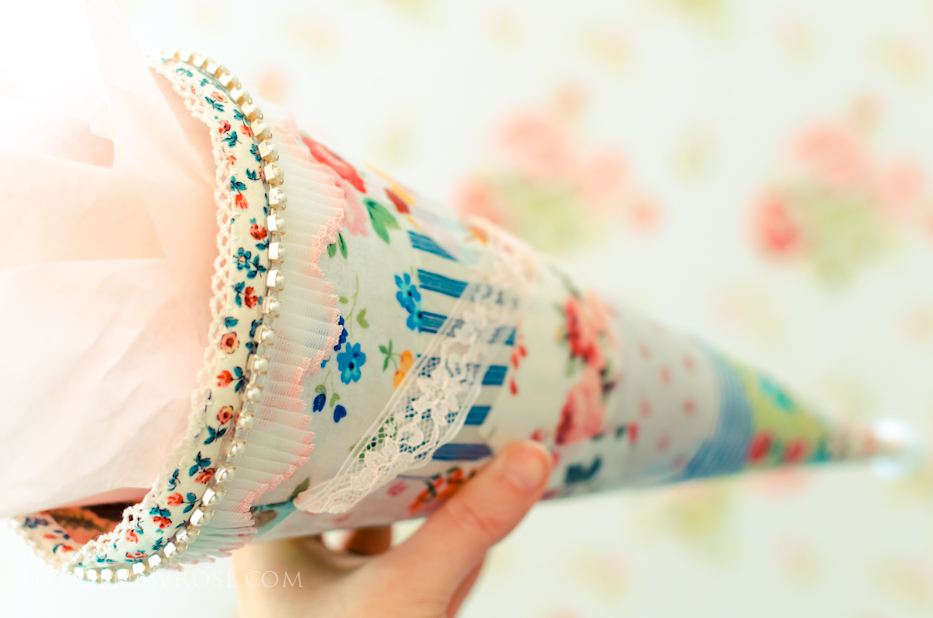
This is so easy-peazy that I’m pretty sure from the photos you get the gist. I started by painting and decoupaging the inside of my cone with scraps of vintage wallpaper, first. Next, I began decoupaging scraps of fabric around the outside, randomly overlapping as I went, i.e., at first I tried making the seams line up as you would when sewing a quilt and then I came to my senses and just had fun with it.
Once the fabric has been secured down with a fair amount of the decoupage glue, allow it time to dry completely before moving on to the trims and embellishments part. This would be a good time to make yourself that second cup of hot cocoa. 😉
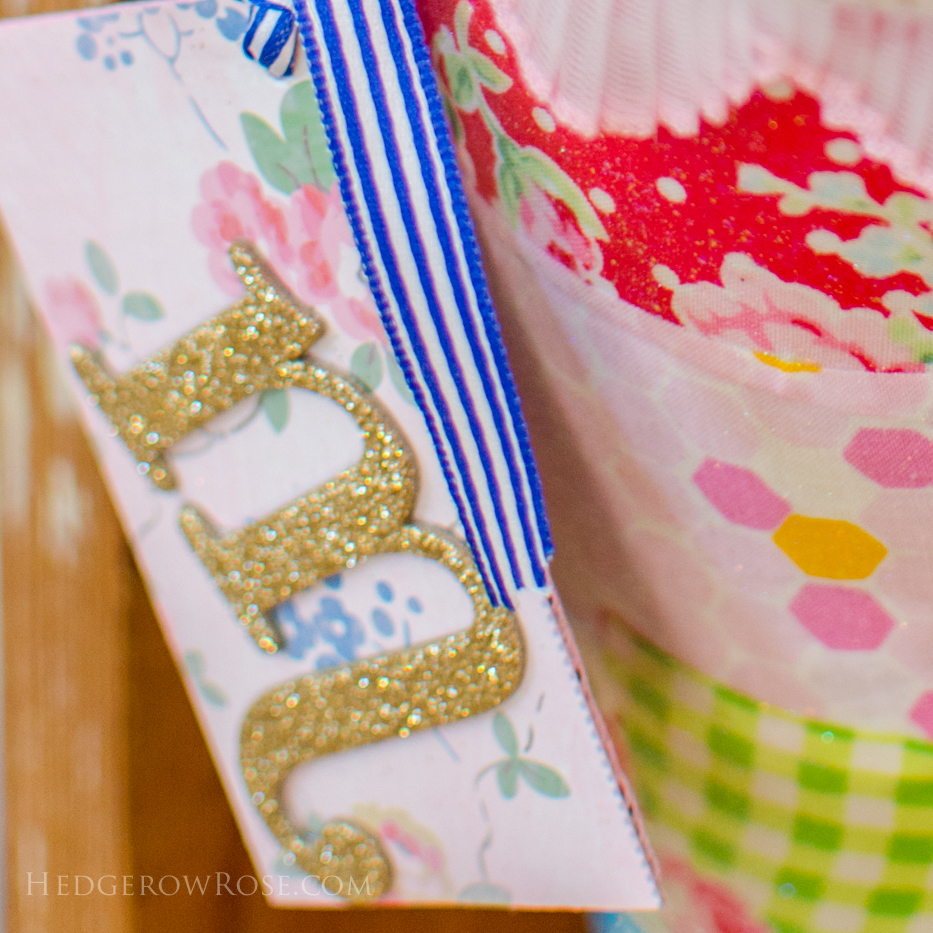
Once the decoupage glue has dried, using something sharp, make two holes on either side and add some ribbon for hanging your cone. Hot glue various trims and embellishments along the seams and wherever else you think it needs a little pizzaz. I made a gift tag out of scrap floral cardboard from a Cath Kidston box to which I affixed a glitter letter “M” for Madison.

Fill with tissue and treats and hang on a doorknob or such-like. This cone was made for my daughter for last year’s Valentine’s Day hence all the pink but you could really play around on the theme and chances are you already have what you need to make these. (Might be a neat craft to do with children, too.)
Have fun!
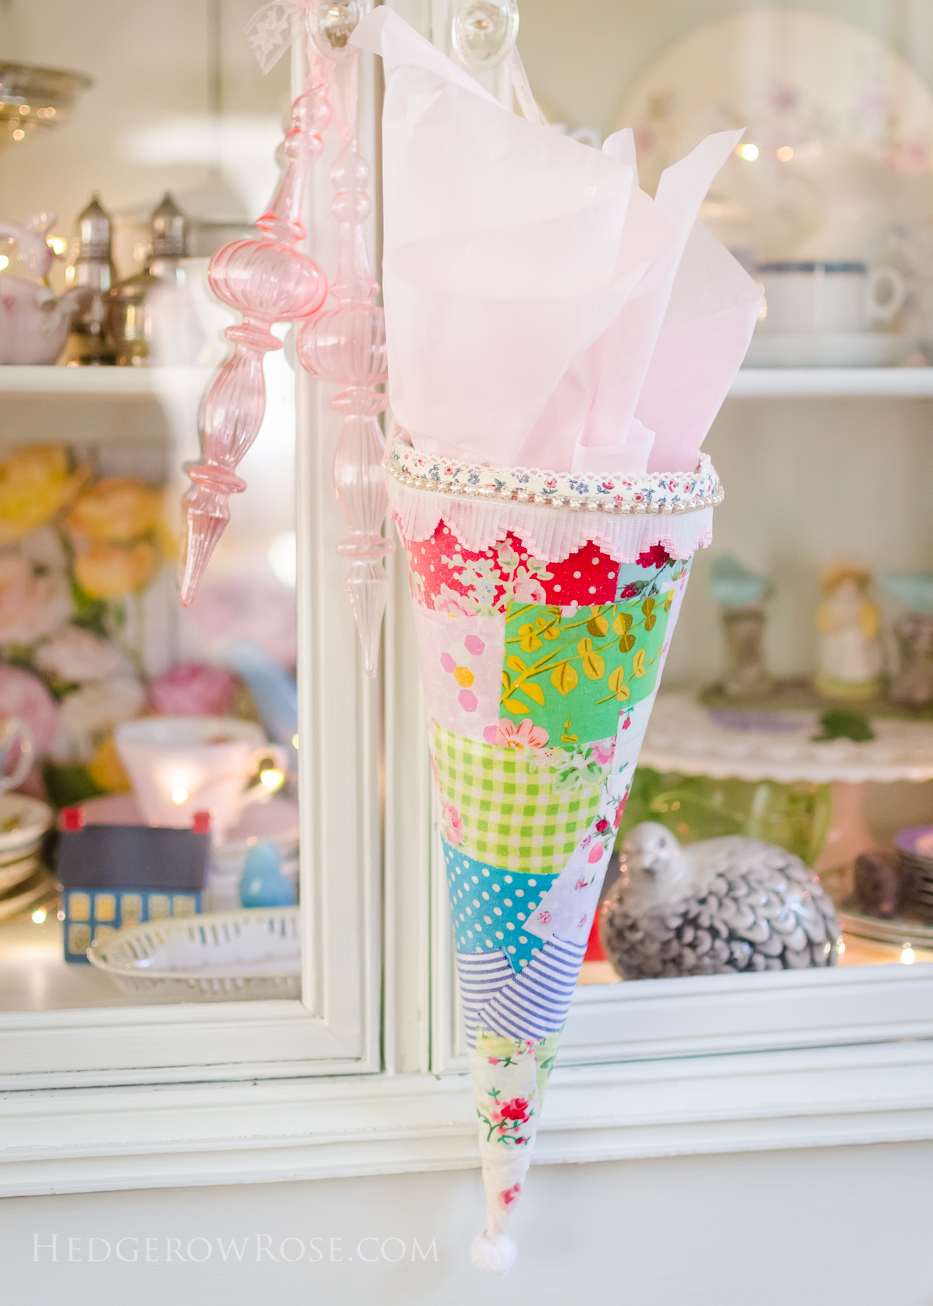

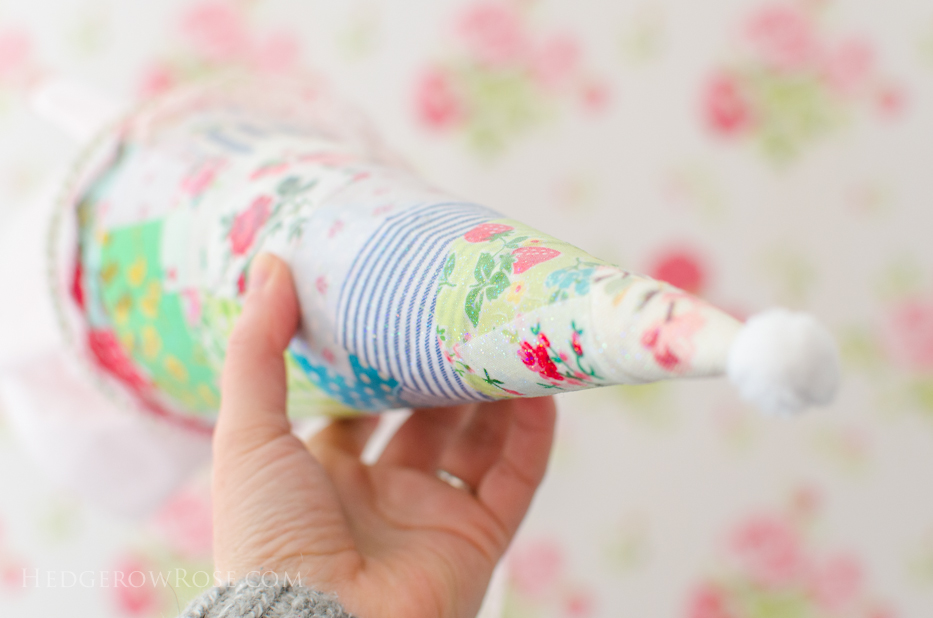
So cute!!! The pompom on the bottom is darling, although might be a little too tempting to our kitties, so ours will have to be pom-pom free I think. 🙂
On an unrelated note… I received an early order of some Austin’s, that I’m desperate to get through my zone 7 winter. I’m really freaked out about it as they are baby roses or I guess what would be considered “banded” (?). I transplanted them from their tiny pots to bigger pots. My first freak out is – I used a mixture of humus soil and peat moss, when I transplanted. Now I’m questioning if I shouldn’t have used peat moss, due to the acidity?
Second and most major freak out is – I took a huge plastic tote, drilled holes in the bottom, added a layer of much on the bottom of the tote, lined my pots up inside, filled in all round the pots&plants with more mulch, then I put empty used plastic nursery pots upside over the top of the plants, and added more mulch and straw around the upside tops. I call this my poor man’s plant garage. 🙂 I placed it on the porch surrounded on 2 sides by the house walls. Should I be watering this, if so how often? Is the rain water enough or would the water freeze when it gets really cold and ruin them? Should I cover it so they don’t get any water? Sorry for the barrage of questions, but you are my rose guru. 🙂
Hi Kimberly! Well, this is actually something I might be able to help you with because I experienced the same thing last winter with my David Austins! Fall of 2015 I ordered some of their “own root in 2 quart pots” which I think is what you’re describing? And when they arrived I was like, what is this, these are SO SMALL. I guess I was expecting something more established–not sure why since I purchase bands all the time–and I wasn’t sure how to overwinter them since at our new house we no longer have a garage. I did what you did, I potted them up into something a bit larger (and I’ll talk about your soil question in a minute) and then, for the remainder of the winter, I kept them all lined up on our porch up against the house where they had extra protection from the wind and extreme cold. (This year, not wanting a porch full of roses, we built a coldframe to protect the young roses which will be described in an upcoming post.) I think I only gave them a bit of water once or twice but our pots were under an overhang and were not exposed to rain. Yours should be fine if they’re getting precipitation naturally. You brought up a good point about water freezing in the pots and killing the roses: if the drainage is good, this shouldn’t be a problem. I did experience this once at our old house when I accidentally killed a container rose because the drainage holes were clogged and the water in the soil basically became a solid block of ice suffocating the roots. Again, adequate drainage should prevent this. Just one last thing about wintering since we’re both in zone 7, and it’s been pretty mild so far, feel free to leave the upside tops off and allow your roses to go dormant naturally, exposed to the air. If we start to get really cold, say like in the 20’s and teens, you might want to put the tops on them to give them some added protection. (It’s really the cold wind that seems to do the most damage, in my experience.) Does that help? I hope so! OK, now on to your soil question, and it’s like you’re reading my mind because I have another post in the works which talks a bit about soil pH in potting soil. 😉 Anywho, short answer, I think you’re fine. As you already know, the sweet spot for roses is around 6.8 but they’re pretty adaptable. While certain nutrients might not be available to them at much lower or higher pH, what you’re describing sounds fine. Again, the biggest thing I’ve found to be most important is proper drainage and a rich (high in organics) soil to make your roses happy. Sidebar: we have really, really acidic soil at our new garden and I’m going to be saving my pennies for this pH reader so I can make adjustments throughout the garden as needed. Let me know if I can answer anything else for you! I’m just muddling my way through this whole rosy adventure myself, but I’d be happy to share anything I’ve learned if it helps! 🙂
Thank you SO MUCH for your advice!!! As always you are my mental life saver/hand holder when it comes to my roses! I was ready to gather up the roses in my lap and just rock back and forth with them in the corner until spring! lol
The roller coaster of emotions with this issue has been so much fun for my honey. 😉 I go from ecstatic about the roses, to good old fashioned Victoria era hand wringing, to a melancholy Eyeore-ish sadness about winter and my roses not blooming. I’m going to add another emotion for him, obsessive – truth be told that’s not really new. I’m going to fine tune it in this case to “obsessive drainage holes” and have him drill more drainage holes in the big tote and maybe even in the pots. Yes, I could, drill the holes myself but I will be much too busy, hanging over his shoulder supervising and talking baby talk to my roses. haha
All crazy rose lady aside. This does make me feel much better, that these little roses (yes, the 2qrt own root – so small!) will make it and I am not killing them with the soil. I was ready to go out and try to replant them all over again without a hint of peat moss!
I will take the tops off, until it gets really cold. I was concerned that this week and next being so warm (50’s-60’s) that they would get too warm with the tops on, so I’m really glad you mentioned that. I’m looking forward to your cold frame tutorial, potential copy-cating, in my garden pending. 😉
I do have one more question but I’m already reaching term paper length and it’s involved, so I will wait. 🙂
Oh my gosh this cracked me up! You have such a way with words! My husband can truly relate to what yours is experiencing but hey it’s like I always say, there are worse things to be silly out about than roses, right? Which reminds me, have you ever read the book, Otherwise Normal People? If not, check it out, it’s hilarious!
PS my cold frame post is up! 🙂
P.s. Yes I read your post “how I prepare my roses for winter” (several times) but as you can see I’m being a helicopter parent over these Austins.
All my grandkids are poor college students. I really don’t like giving cash, but that’s what they want. So, I’m always looking for ways to give cash that’s a little more like a real gift. These cones would work! With a large enough cone I can add a few other little things.
I’m interested in your answer to BrocantesueRose. I put my potted roses on a table under a window in the garage for the first time last winter (as per your instructions) and pretty much left them alone, but felt I should be doing more. They’re our babies, for goodness sakes!
I’m soooo glad I’m not the only one who feels this way!!! 🙂
I’m so glad that I’m not alone in being a bit of a fussbudget with my roses, too! Yes, they are like our babies. It does seem like we should be doing more when we tuck our container roses away for winter (and back at the old house, when we overwintered them in the garage, I was always in there checking on them) but like I said to Kimberly, I think if they have proper drainage and are protected from extreme cold/wind they should be fine. Some rosarians also like to remove the leaves as part of their overwintering procedures. This eliminates any concerns that larvae might be hitching a ride on them and any diseases overwintering on your roses. You could do that, too, if you’d like. In zone 6 garden, they dropped off naturally as the rose went dormant and I just swept them up and discarded. Last winter, in our new zone 7 garden, many of the roses held onto their old leaves through winter so I snipped off what I could but honestly I didn’t stress too much about it. 😉
I’m so pleased you liked this craft idea! 😀