
How I Propagate Roses (and Boxwood!) From Cuttings
Hi guys! Are you ready for that post I promised on how I propagate my roses from cuttings? Finally, right? I know, I stink at consistently writing “how-to” type posts; I think they’re going to take away my blogger card. They’re tough for me but I’ll get over it!
I’m excited to share this how-to, though, because if you’re like me, you’ve had inconsistent results at propagating your own roses from cuttings. I tried lots of techniques (and really, there is no right or wrong way to do this) but my main problem was that my cuttings were rotting before they took root. Once I tweaked my steps just a little bit, things started to come together and my success rate went from sporadic at best to about 90%! It was a great summer!
Here are the products I used: Vermiculite, Perlite, CowPots, Rooting Hormone Powder, sharp Bonsai Scissors, Trays, Buckets, Popsicle Sticks, Permanent Marker, Pencil.
Part 1: TAKE CUTTINGS:
Step 1 – Mix vermiculite & perlite in a bucket using a 1:1 ratio
– Remember I showed you how to root lavender cuttings? This is the same technique!
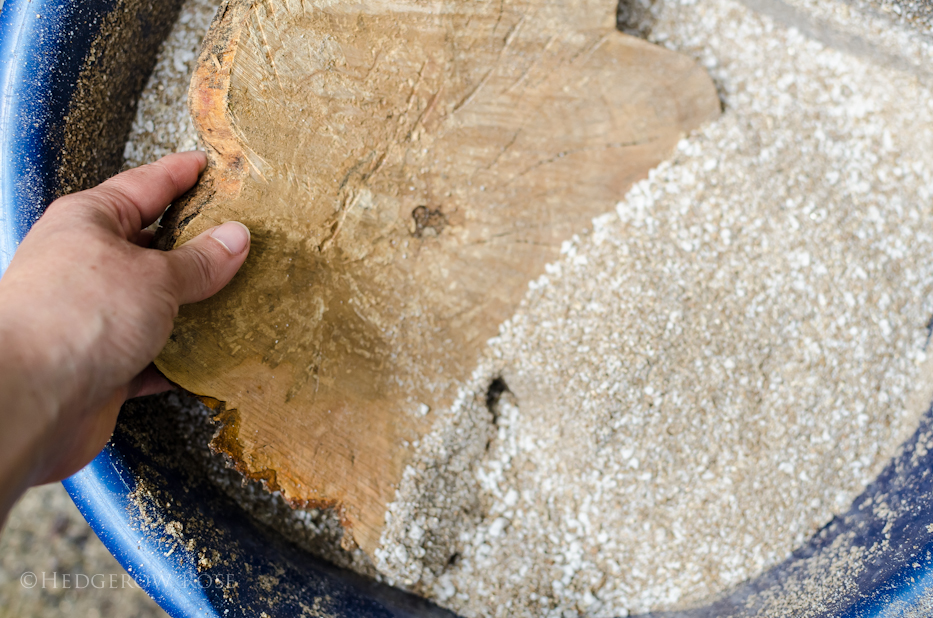 Photo above: mix your vermiculite and perlite. I am using a tree cookie “scoop” in this photo but you can use a trowel, your hands, a spoon…whatever you have to hand.
Step 2 – Prepare CowPots
– Just as you did with the lavender cuttings, fill your CowPots with your vermiculite/perlite mixture and wet down until it looks like packed, wet beach sand. I like to put my CowPots in a tray first, so it can catch the water and keep the cuttings in their pots from drying out. I’m sorry I don’t have a photo of this step but it’s pretty self-explanatory. Oops, I forgot to mention that I use whatever size CowPot I happen to have on hand, but I like the 3″ size the best for this type of thing. Also, it’s OK to fill each pot pretty high because it will settle and you want to gently firm it down after it’s been watered in.
– Take a pencil and poke a hole 1-2″ deep in the center of each CowPot to get it ready for the cutting.
Step 3 – Take cuttings
– Timing: When to take your cuttings? I sometimes get them as early as the first signs of spring. Why is that? Because that’s when the rabbits in our garden start going crazy and biting everything they can get their little mouths on. I hate seeing a rose cane just lying there and not go to some use so I’ll start rooting it even before it’s leafed out completely. Most of the time, though, I like to take my cuttings immediately after the first flowering which for us is early June for the OGR’s and late June for the Moderns. Last summer, I got so rooting happy that I was taking some as late as August but that’s probably not recommended and it really depends on your climate zone.
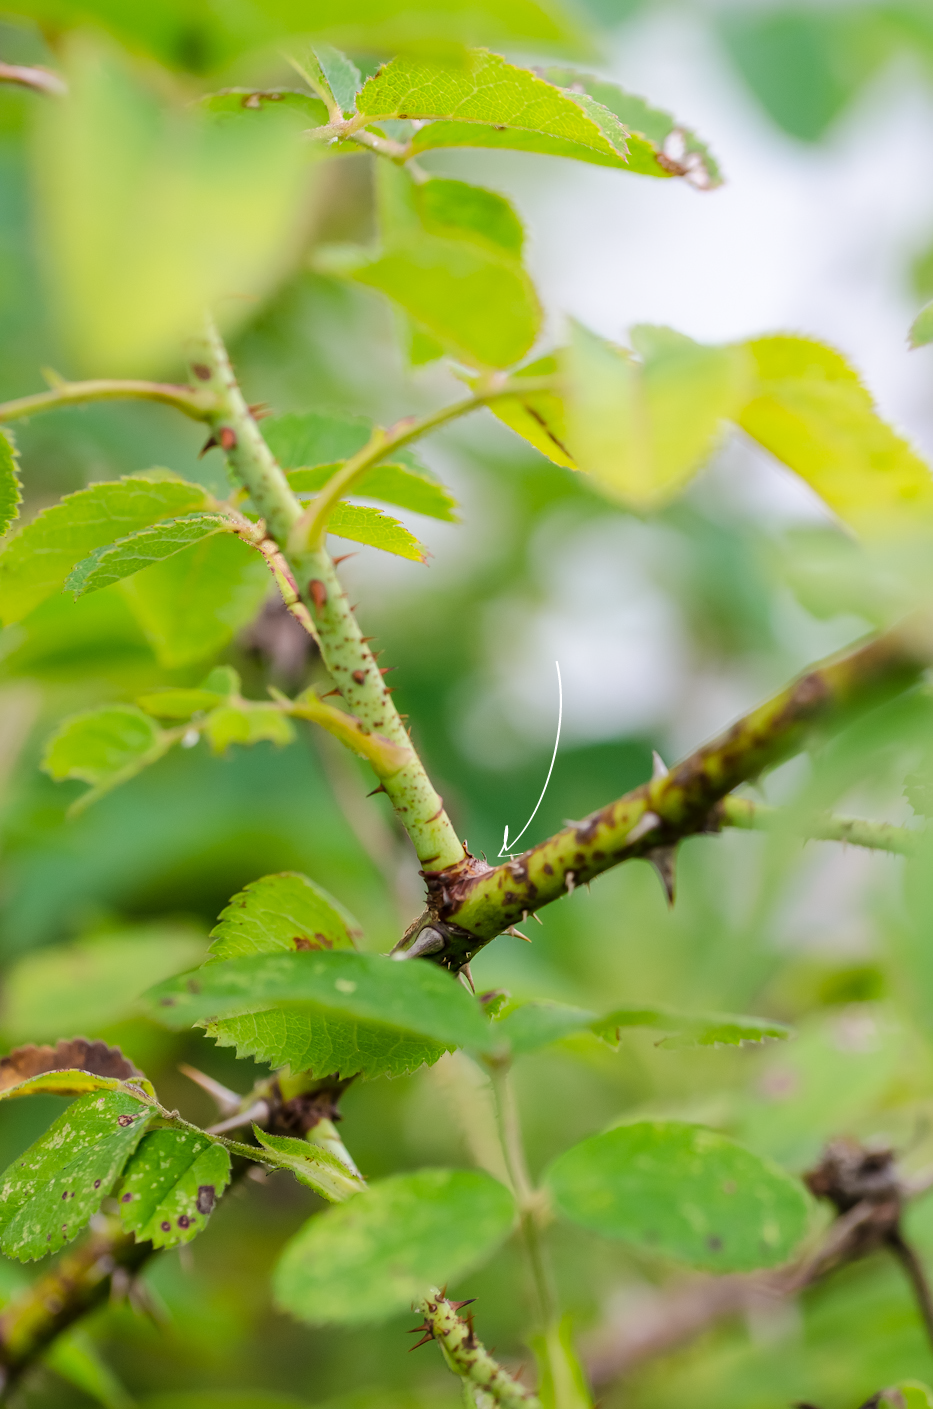
– Many of you have already done this before, so forgive me if I’m telling you something you already know, but there is a method to selecting the best cuttings for rooting. First, you want to take a stem from last year’s growth and one that you know has flowered. (If you’re doing this as the rose is breaking dormancy in early spring, look for the decayed flowers/hips of previous year.) Trying to root a cane that’s brand new will usually lead to it rotting. A cane that’s already had a season under it’s belt has a better chance of success. See following photo for an example of a ‘Petite Lisette’ cane which has finished flowering and is ready to be cut.
– Next, when you make your cut, do so at “the heel” of the stem–that is where it meets the main branch. Is it necessary to always take a cutting at the heel? Nope! But there is a larger quantity of cells at this “heel” and I’ve found better success of it taking root. See following photo…
Step 4 – Prepare cuttings
– If I’m doing a lot of cuttings at once, I might carry a bucket of water with me and drop them in as I go so they don’t dry out. (Those plastic plant tags are good to use in a case like this so you know what’s what.) Usually, though, I’m only doing a couple at a time so I take my cuttings immediately over to my work station and wet them down with the hose.
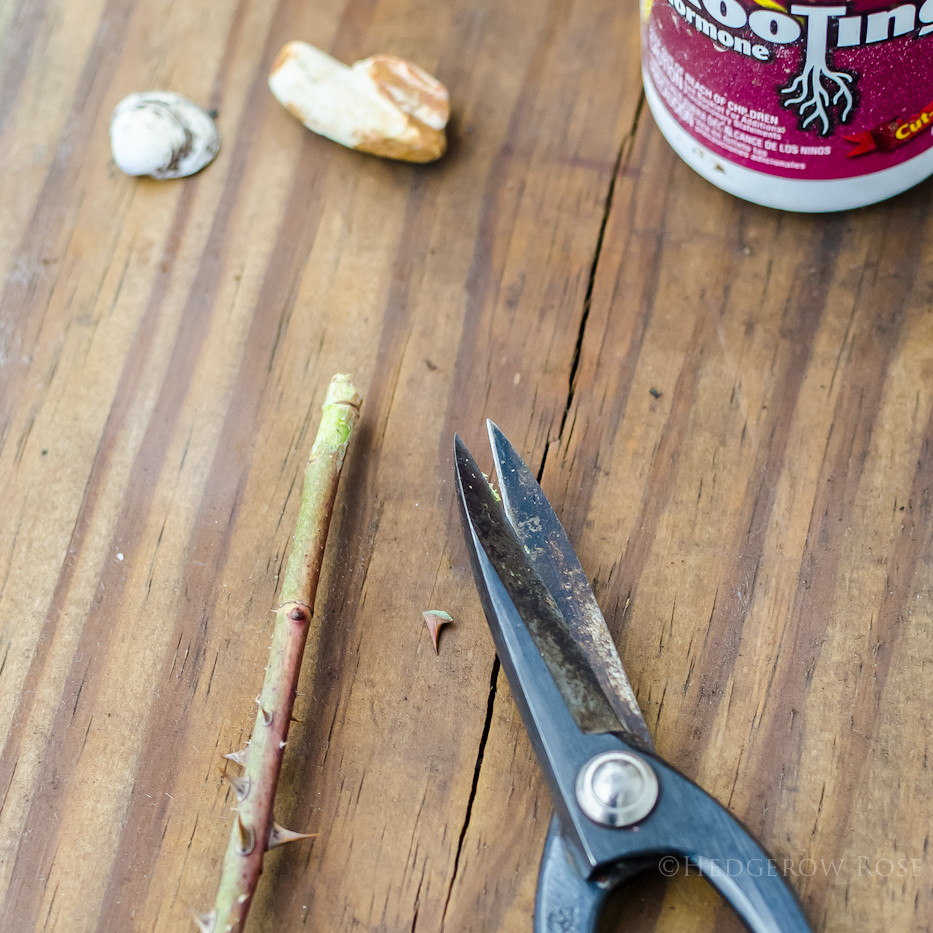
– Next, I snip off the bottom leaves and the bit that’s flowered from the top leaving just 2-3 leaf sets. See photos above where I show the parts to snip off.
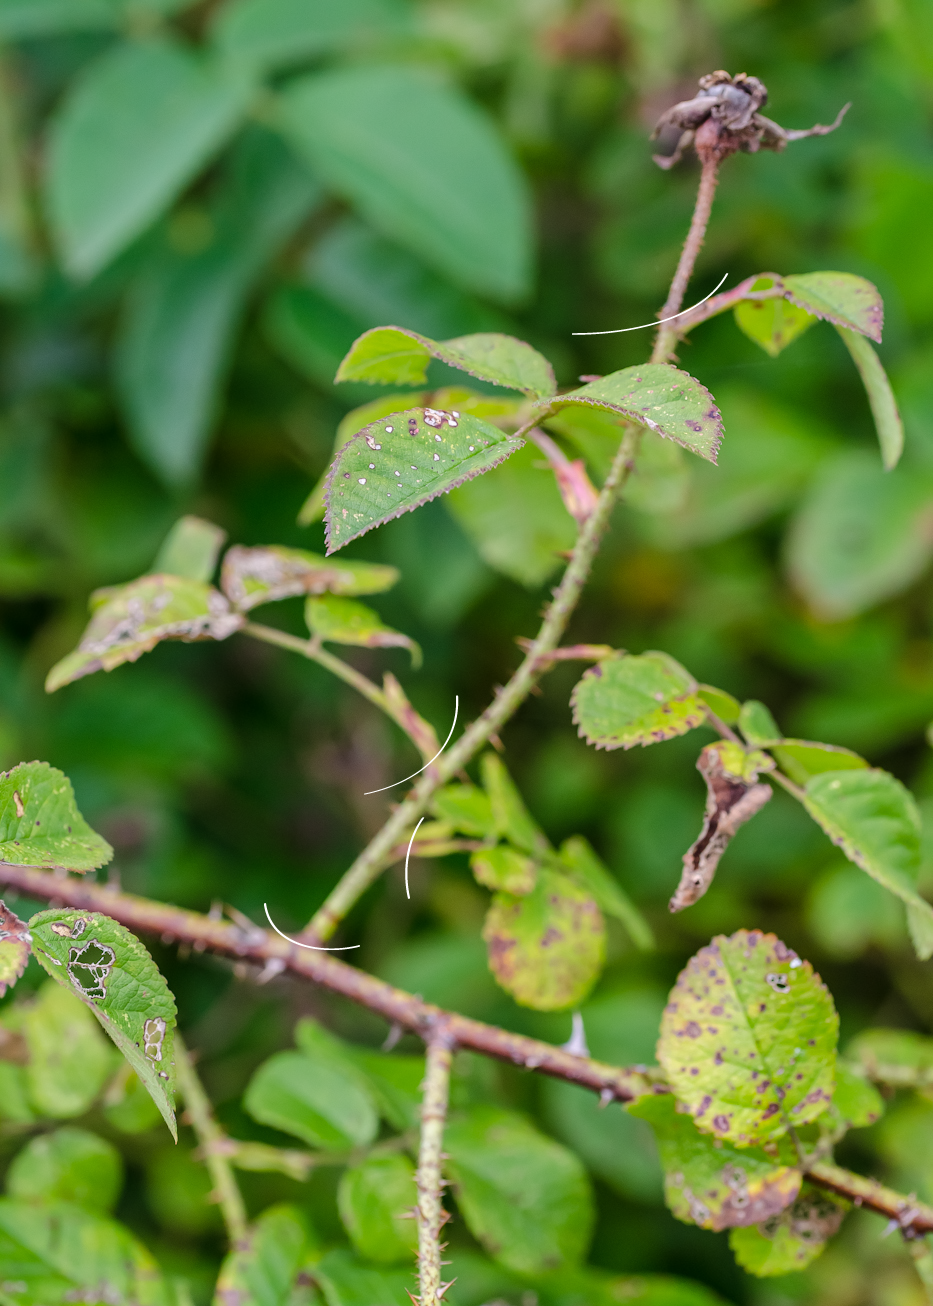
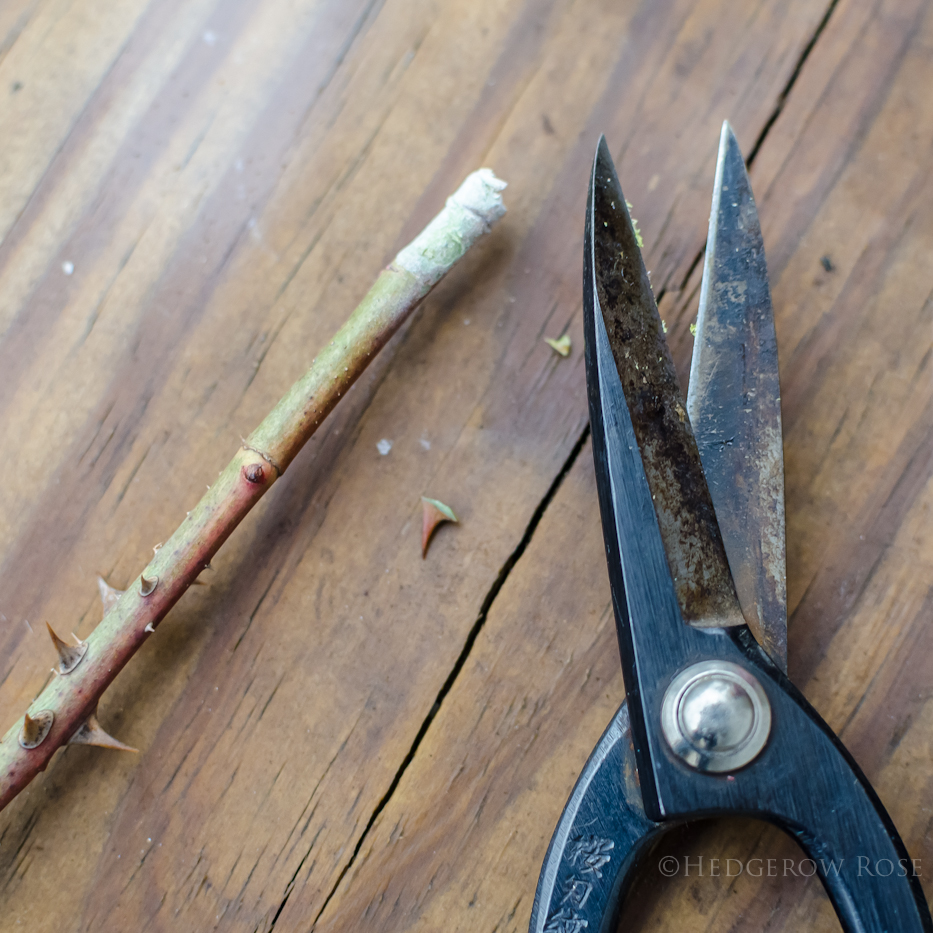
– Then, I take the sharp edge of my scissors and gently scrape the outer layer of the stem on the very bottom where I’ll be dipping into the rooting hormone. I scrape only about 1/2″ up from the bottom (where the heel of the stem met the main branch) and just enough to expose the lighter layer beneath. Some people like to remove the thorns, too, and that’s cool if you do, but I don’t bother. If they pop off on their own then OK. See photo below of a stem I took just this morning. Normally I wouldn’t take cuttings so early in the season but I forgot to take photos of this step last year. See notes above as to when to best take your cuttings.
– Last, I wet the end and dip into the rooting powder blowing off the excess (too much powder can actually inhibit rooting) so it’s just a light film-like coating. It’s best to not dip straight into the rooting hormone container so you don’t contaminate it for next time but instead put what you’re going to need in a separate dish. In this case, do as I say not as I do. 😉 Normally I wouldn’t take cuttings so early in the season but I forgot to take photos of this step last year. See notes above as to when to best take your cuttings.
Step 5 – Insert cuttings and label
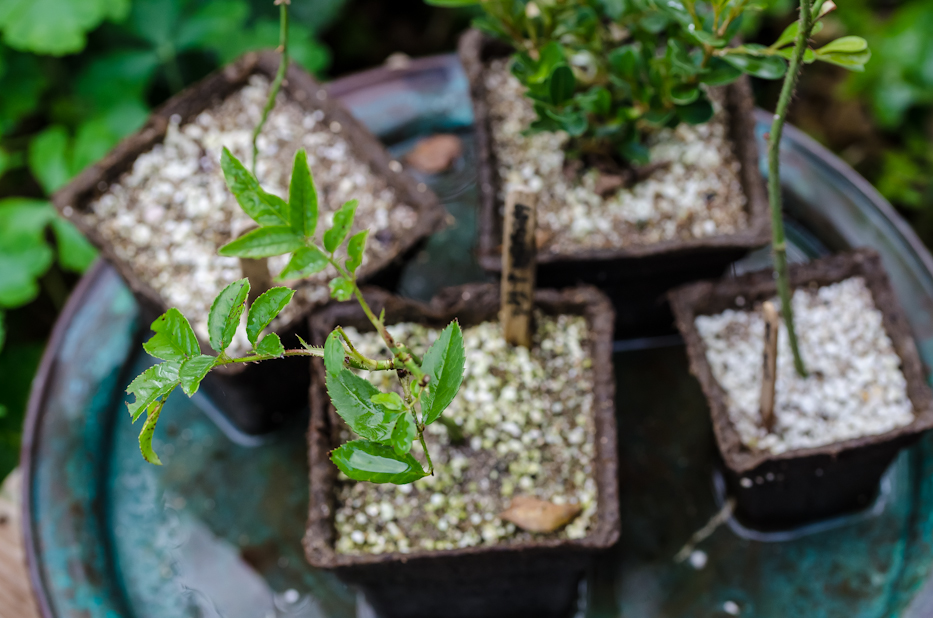
-Are you still with me? Now we’re at the fun bit! Go ahead and gently insert your cutting into each prepared CowPot and firm the medium around the stem to hold it in place. Add a label (popsicle sticks work great for this) and give it another light watering. Please note that the following photo shows a lineup of some cuttings I took over the summer but this picture was taken without them in the tray and I want to stress that I do always use a tray to catch water and help keep cuttings from drying out.
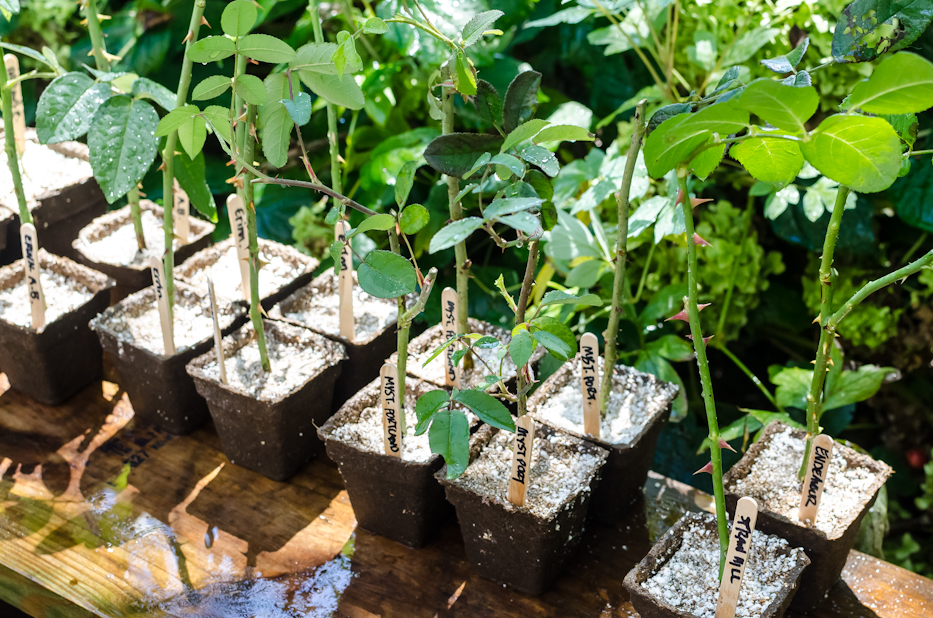
Here’s another photo of some rose cuttings that I had taken along with some boxwood that I’ll talk more about at the end of this post. If you’re looking for copper trays, by the way, check Ebay. You can find some good deals and they look so much prettier than blah metal or plastic ones.
Part 2: MAINTAIN CUTTINGS:
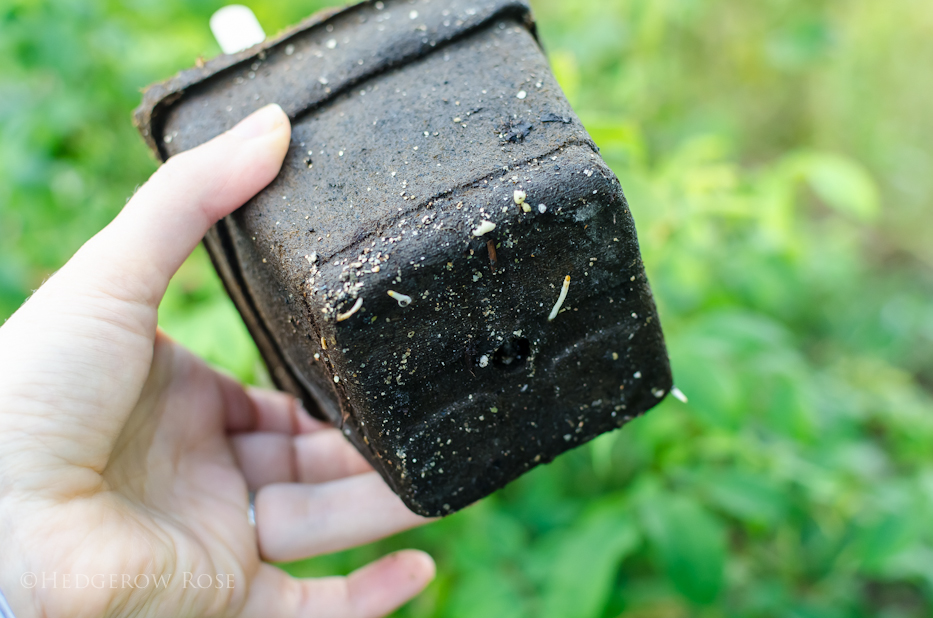
– At this point, you might be thinking, “Hold up, when do you fashion some kind of greenhouse tent type thingy like say from the half of a soda bottle like you see on on those Pinterest pictures” and the answer is, I don’t. This is what was causing my rotting problem in the past, I’m fairly certain. See, we garden in a very humid climate so I decided to just let nature help me out with this one. My cuttings are placed on a potting bench in an area of the garden which is out of direct sunlight and near the hose so when I walk past I mist it over as needed to keep the pots from drying out completely. This is important: do not let the pots dry out. You can tell if the CowPots are still damp because the color will be a dark versus light brown. If you live in a dry climate, you may want to fashion some kind of greenhouse thingy around each cutting to keep humidity levels up so please, by all means, research what other rose-gardeners are doing in your area!
– Don’t be afraid if the leaves you left on the cutting start to fall off. This happens sometimes and they will regrow from the bud eye once the cutting takes root. As long as the cutting isn’t rotting, it’s doing it’s thing.
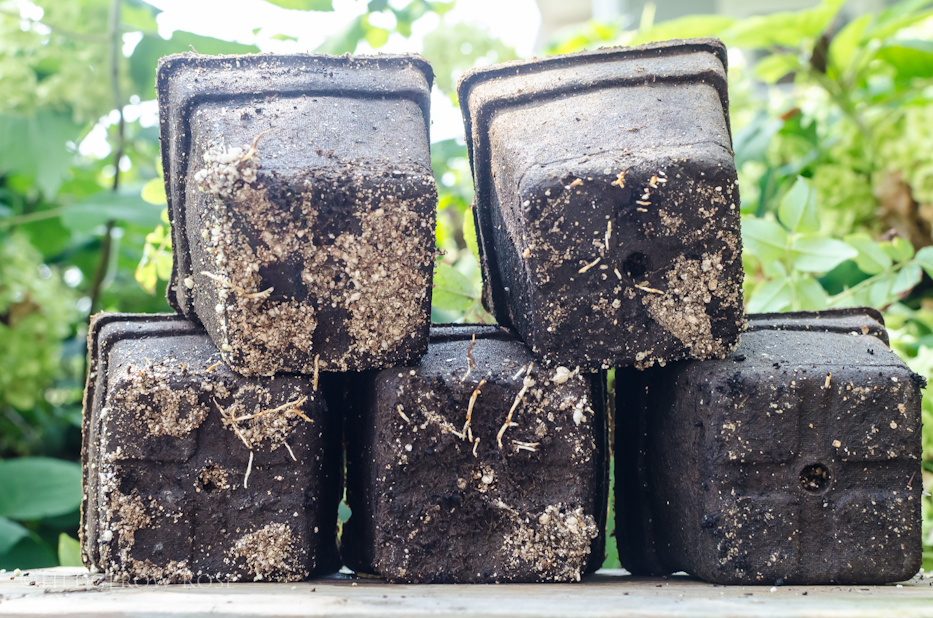
– After several weeks, and this depends on the variety of rose as some will root faster than others, check the bottoms of the CowPots and if you see tiny roots poking out start doing your happy dance because you did it! You’ve successfully rooted a rose!
Part 3: POT UP ROOTED CUTTINGS:
– Using a soil mix of your choosing, like this one, pot up your cuttings into a larger container–a 1 gallon pot is my preferred size. Drop the entire CowPot in–just as you would if you were planting a peat pot. Easy-peasy and it doesn’t disturb the root system! Don’t use a “chemical” fertilizer as it is too powerful for the new roots and may kill your rose. Compost tea and good soil is all you’ll need.
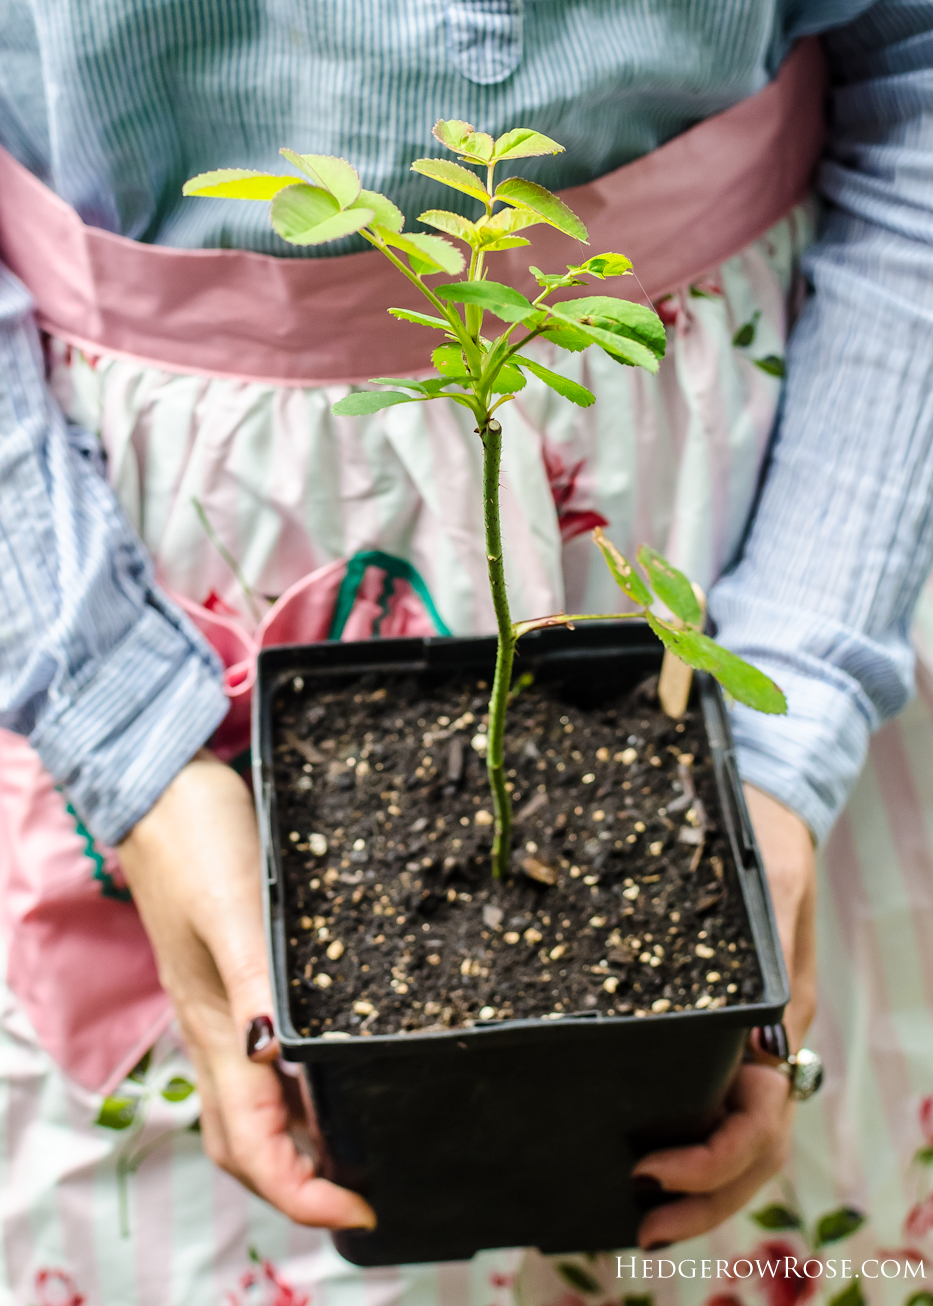
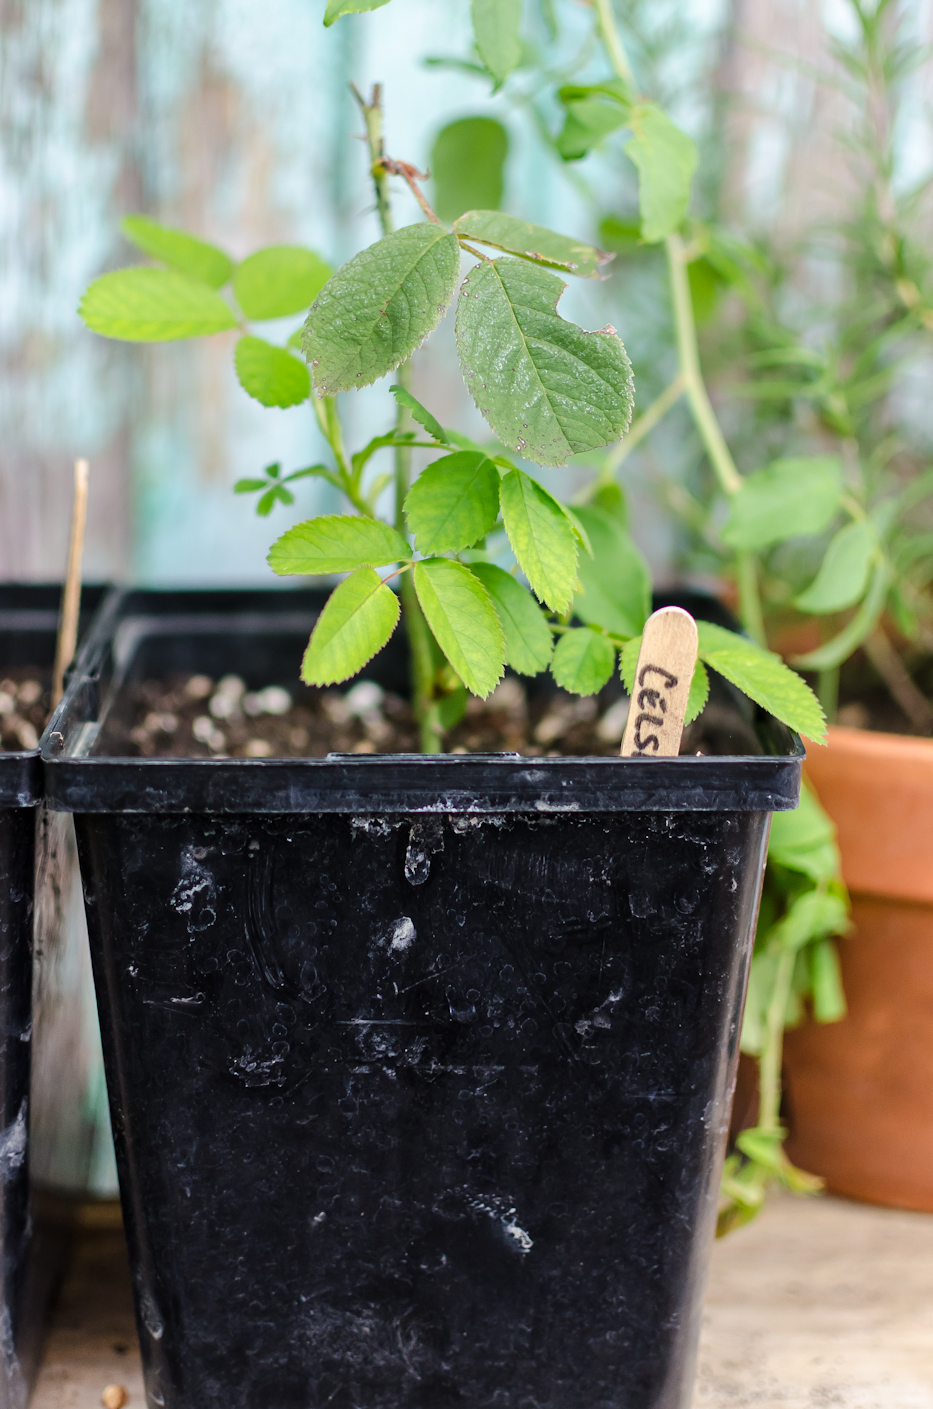
– Bring your potted rose out to a sunny location now and at this point I like to go ahead and start watering it with compost tea just as I would the rest of my container roses. (Alfalfa tea is also good stuff, too!) The following photo is of ‘Celsiana’ after she was rooted/potted up and brought to a sunny location. Note the leaf set on top is the original and the younger leaves on bottom are newly formed.
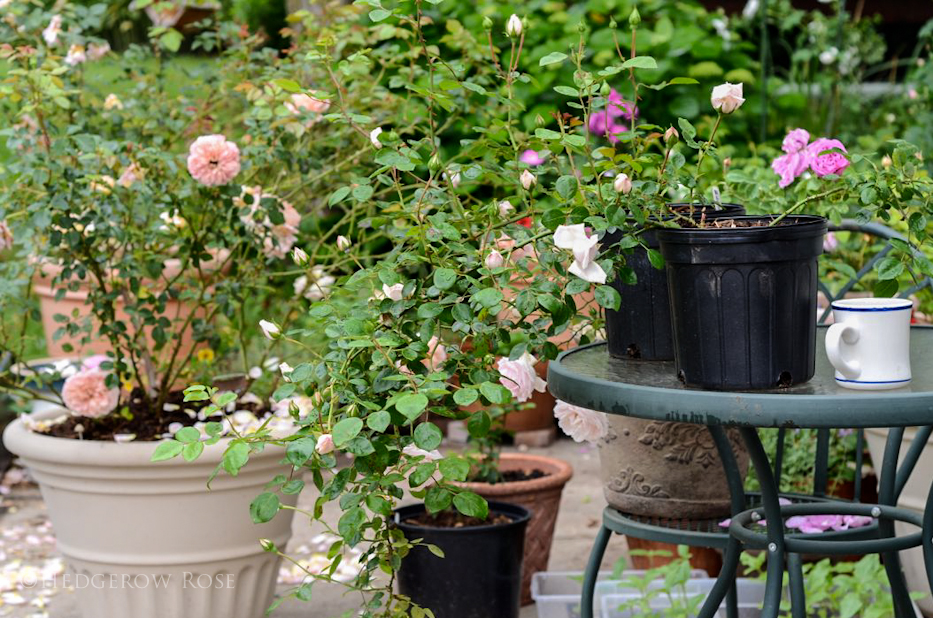
– Just like when I pot up my banded roses, these roses grown from cuttings need to stay in a container for at least a year before they are mature enough to be added to the garden. They will also need winter protection that first year just like larger container roses. The photo below shows some Dr. Van Fleet roses (on table) that I rooted for some family members. This photo was taken the year after they were rooted/potted up and ready to be planted out into the garden.
Phew! When I started this post I didn’t think it would be so epic! But I hope that I have helped and answered any questions that you might have and again, I want to stress that this method is simply one that has worked for me. There are lots of ways to go about it and no “right way” so find what works best for you!
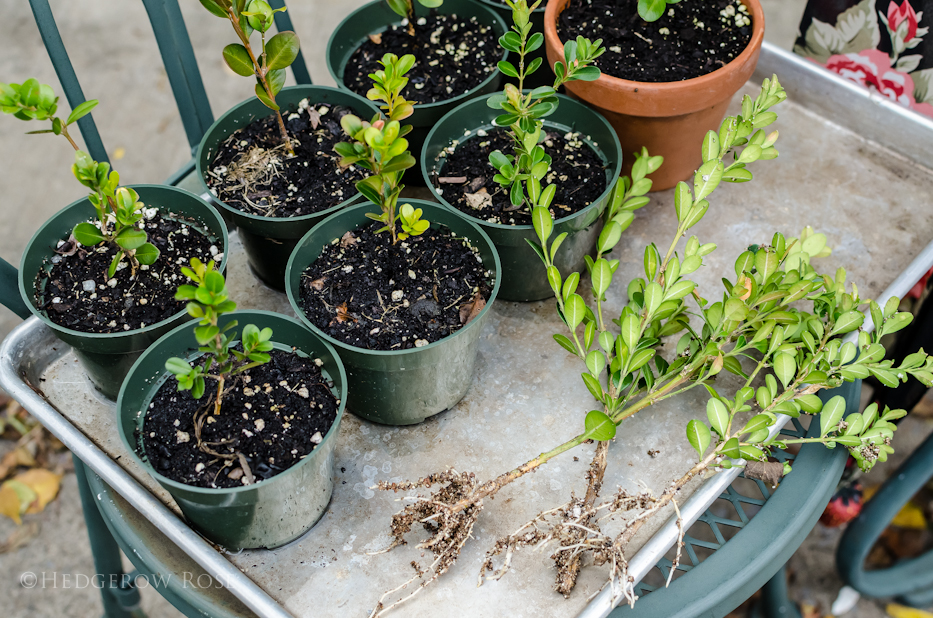
Oh, PS, this method also works really well if you’re thinking of taking boxwood cuttings. Actually, it’s even easier with Boxwood, because 1: you don’t need to cut at the “heel” of the branch, and 2: you can stuff a bunch of stems into a container filled with your vermiculite/perlite mix to maximize space. When the roots start poking out of the bottom, gently remove the stems and pot up in individual 4″ size containers like I show here in the following photo…
Best of luck and happy rooting!
{EDIT PART 1: I’ve recently been introduced to these starter plugs which have been utilized with great success by other propagators and I plan on giving them a try. I’ll report back with my findings!}
{EDIT PART 2: Reporting back with my findings! OK, I tried those starter plugs and hated them. Well, that’s too strong of a word, but they were definitely not my cup of tea. I’m back to using my cowpots and vermiculite/perlite mixture and all is well in the world again.}
Holy Cow – that was so perfect! Now I know why your cuttings worked with those roses and mine didn’t! This was an awesome post!
Thanks Mom! 🙂
Yay! So happy you posted this! Now maybe this time I will get it right, thank you. 😀
Best of luck! Let me know how you fare!
I am going to propagate my souvenir de la Malmaison this summer following your method. Thanks so much for sharing this with us.
Ooh that’s a good one, too, so I hope you get lots more SdlM babies!
What an incredibly generous soul you are Laurie to have taken the time, a LOT of time, to write this wonderful post. I’d been wondering about this subject and now I know thanks to you! I’ve never been much of a propagater, but your post encourages me to give it a try. I actually came in search of tips on growing roses in containers and so appreciate the helpful links in this post!
Thank you Cynthia! It truly was my pleasure. If you get a chance, let me know how this method worked for you. I think we’re in similar climates so it will be great to see if you get the same results!
Cowpots and routing hormone ordered, check!
😀
Thanks for such a detailed post! I’ve never had any luck with cutting because I get too impatient. I’m going to try this with my rosemary bush and my mysterious peppery weed rosebush.
Haha, I get too impatient, too! Totally understand. 😉 Good luck!
Can I use any other soil besides vermiculite? I am from South East Asia. Don’t think I can find vermiculite. However, I have perlite.
Hmm, I’ve never tried anything other than vermiculite personally, but I have read that an alternative would be the use of Coir or even finely ground pine (untreated). Hope this helps!
Great post, thanks for it! Now I should be able to up my percentage from 25% to 75%!!!!! I hope! Do you think I can do olive trees this way too?
And gardenias?
Gosh I have no idea! Never propagated either before. Have you checked the GardenWeb forums?
Hi Holly,
Found this article on propagating olive trees, and this article for propagating gardenias. good luck!
Gosh, You are so sweet! Thank you so much for these!!! I cannot tell you how much I appreciate the kindness of you finding these!
Sending you mucho happy wishes!
Oh it’s my pleasure, Holly! 🙂
I’d love to hear how your olive and gardenia propagation turns out!
I did gardienias they were faster than the nikko blue hydrangeas to root well by a few weeks.
My first.try at box wood was super slow. Red maple, elm, willows and varigated euophamus (spelling?)did exceedingly well.
My crepe myrtle cuttings all failed. And barberey which is supposed to be easy, I have tried and tried. ?
Im moving in a few years to a barren quarter,and am trying to end up with some landscape able starter plants on the cheap. Very addicting this gardening is becoming
Good day to all
And thank you to our blogger for her time and effort
Hi Lori, welcome! Sounds like you’ve been busy with your propagating. It’s such fun, isn’t it?
This is so exciting! I, too, have tried and failed in the past, but you’ve convinced me that it’s possible. Such a happy sight all those baby roses!
If you try this technique, please let me know if it works for you! I hope so!
Hi Laurie, your post is one of the better-done I ever read before! I Thank you very much for the knowledge and love for roses you share with us! I’m from northern Italy, Lake Maggiore, a very humid place (but so beautiful at the same time!), zone 7 in European Climate Map. I fell in love with Roses, especially Old Roses, three years ago and I ‘ ve tried various methods to propagate rose from cutting with few results… Two days ago I stumbled into your fabulous blog, I literally devoured this post ’cause I think we live in similar climatic zones so I become so hopeful and optimistic that today I made 1 Frau Karl Druschki and 1 very double Old Blush China (I can’t identify Her!) cuttings following your method. I’m excited and curious. I Thank you you a lot!
I’m so pleased this was helpful! Best of luck with your propagating! 🙂
Success! My mom has tried (without success) for many years to get cuttings of an old rose that she dug out of my great-grandma’s garden twenty years ago. We have no idea what rose it is–we just call her “Grandma.” A few weeks ago, mom came to visit and brought some cuttings with her. 12 hours in a jar of water in the car was probably less than ideal, and three weeks later, five of the six have shriveled and died–but one is in good shape and today I found a tiny root poking out of the bottom! Thank you so very much for this tutorial. Thanks to you, I am the fourth generation of our family to get to enjoy this heirloom in my garden.
Oh my gosh, YES!! This is wonderful news, I am so happy for you! ♡♡
Hi Laurie! I’m in year 8 in Australia and I’ve been given a large rose cutting (as a gift). Not knowing much about cuttings, I stuck it in my drink bottle until I got back from school. I named my rose Lappy 🙂 Is it possible to grow a new rose out of this one? What would I have to do? This would be different because the flower is young and still bright and beautiful. You mentioned that you should look for old and decayed flowers, but I’ve heard of stories where people successfully root young roses. Also, if I cut off the flower now, and successfully root it, will the flower grow back on the same stalk?
Sorry for so many questions!! 🙂
I love your blog! It’s so nicely done and frequently checked and regularly updated. All the information and pictures look really professional (because they are!) and the whole overall layout is really nice. I’ve liked growing plants for a few years now. I’m so happy I stumbled across your website!
Thanks,
Matt.
🙂
Hi Matt, thank you for your lovely comment! What a great way to start the day today–I am so glad you are enjoying this blog. Yay! 😀
Yes! It is possible to root a new/young rose cane. In fact, that just happened to me recently with a sprig of ‘Gourmet Popcorn.’ I put it in a vase, and then forgot about it. I came back a couple of weeks later and there were tiny roots forming! Now, it’s potted up and I’m overwintering it in a container in a protected space outside. This doesn’t happen too often, though, which is why I don’t describe it as a more foolproof method. And, with any method of propagation, some roses are just easier to root than others. So, I say, what have you got to lose? Give it a try and see what happens! 🙂
Oh and yes, if you get this rose to successfully root and grow, it will eventually produce buds and blooms just like the one you have now. The reason is, when you propagate a rose vegetatively (with cuttings) you’re essentially cloning it. Pretty neat, huh?
Best of luck to you!!
Thanks so much! I’ll give it a try, as well as your method.
🙂 😀
Sorry, just one more thing, should I apply any rooting hormone to the water and the stem to make my rose have a better chance of rooting and should I be cutting off the rose head to allow more energy for root growth?
Thank you very much Laurie,
Best regards,
Matt
Hi Matt, if it were me, I’d just make sure the water is kept fresh, and yes, I’d snip off the flower so it can put it’s energy towards producing roots. There are a lot of forum threads on rooting roses in water on GardenWeb, have you seen them? Some of the discussion might be of use to you. Here’s a link. I forgot to mention in my last comment that there is another option you might like to try: these Rapid Rooter plugs. They might give you a better chance at rooting versus just the water method. Hope this helps! 🙂
🙂 🙂 🙂
Thanks! I will let you know how it goes.
Matt
🙂
Just to say thank you so much for this post! I live and garden near Boston, which also has humid summers, and the method you describe in this post is the only rooting method that has worked for me. I tried it out this summer and, while I didn’t have your success percentage (this probably has to do with me impatiently pulling the cuttings out of the pots to look for roots, haha), I did end up with a beautiful clone of David Austin’s Heritage from a cutting I took in June of an old cane I thought was half-dead. The cutting has even bloomed! So again, thank you so very much. I can’t wait to try this method again next summer!
That’s so awesome, Christine! I’m thrilled this worked well for you and thank you so much for taking the time to comment and let me know! 😀